Page 2 of 5 FirstFirst 1234 ... LastLast
Results 26 to 50 of 116

Thread: Rewrapping my drums - progress thread

  1. #26

    User Info Menu

    Default Re: Rewrapping my drums - progress thread

    Quote Originally Posted by not him View Post
    Try and get some saw dust and carpenters glue mix together and you have some great wood filler.

    I just went and checked everything, and yup, it's going to have to come off...


    BUT...

    I did pre-mix some of the putty with some wood glue, and it worked! So it looks like I'm going to have to deal with the kick and the (*sigh) floor tom.

  2. #27

    User Info Menu

    Default Re: Rewrapping my drums - progress thread

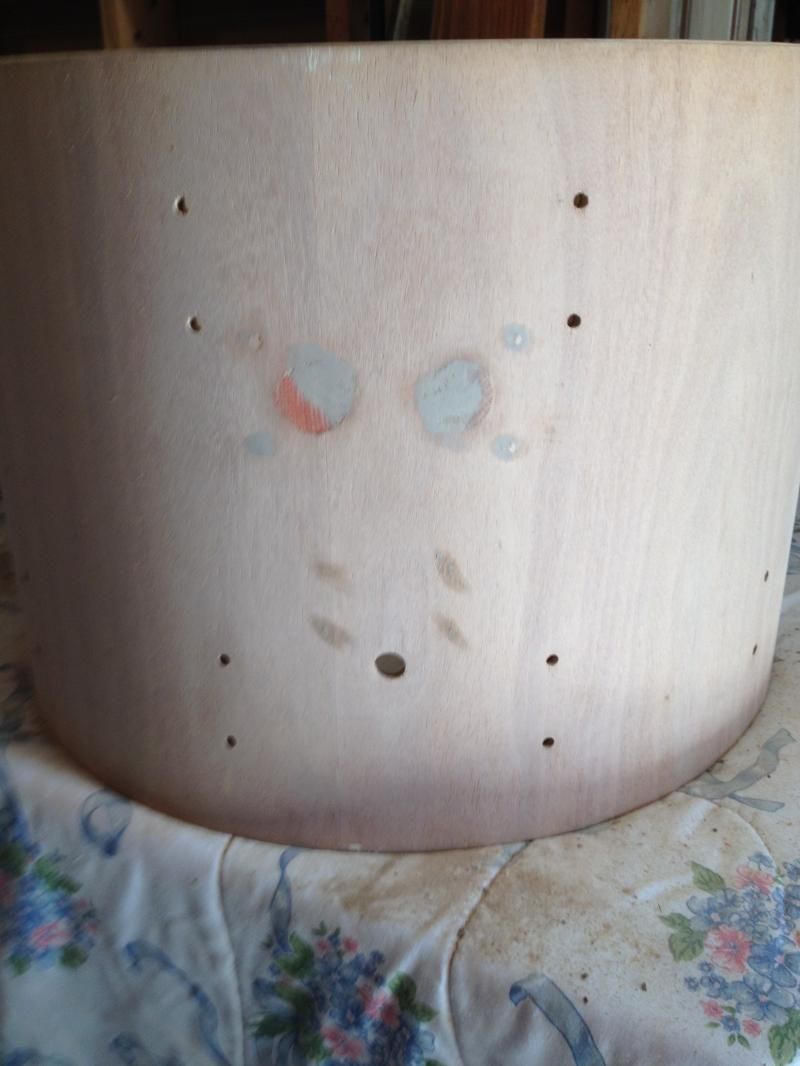
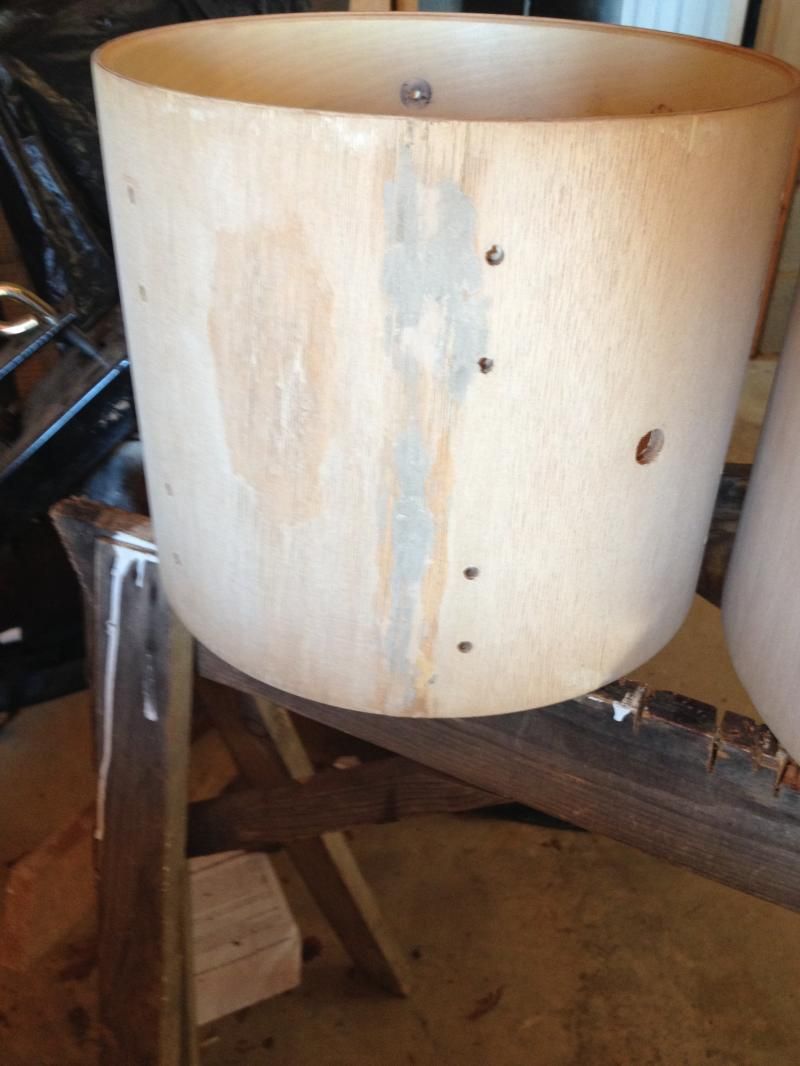
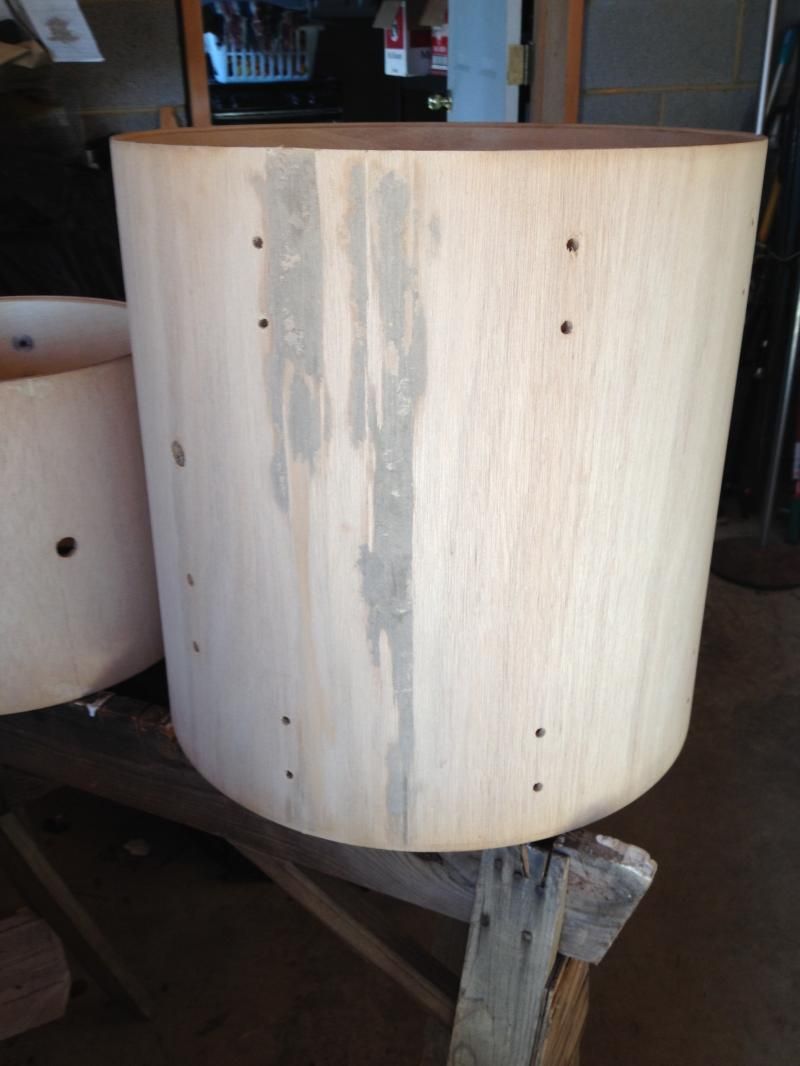
    Bondo is an excellent recommendation, and so is wood glue & sawdust mix. You may also be able to shave the chunk of wood off the wrap with a razor and glue it back. A friend of mine used to work in the cabinetry dept. at Duncan Aviation. They build custom luxury planes and jets for many rich & famous people. He said there are times when a small mistake in an exotic veneer could cost tens of thousands of dollars to replace. They have a team of experienced guys that specialize in "fixing mistakes". I'm told they can sand a hole completely through a piece of finished veneer, fill it back up, hand paint the wood grain and refinish it so you could never tell it was done. I suppose find furniture restoration guys could do the same.
    -Brian

    "Too many crappy used drum stuff to list"

    Play the SONG......not the DRUMS!!!

    "I think that feeling is a lot more important than technique. It's all very well doing a triple paradiddle - but who's going to know you've done it? If you play technically you sound like everybody else. It's being original that counts." ~ John Bonham

  3. #28

    User Info Menu

    Default Re: Rewrapping my drums - progress thread

    Take your time and it will be fine, your doing good so far don't get frustrated.
    Once that wraps on and the kit is set back up this work your doing now will all be worth it!

    BTW- I wouldn't trust bondo on drums, I'd be worried about it breaking loose or cracking apart from all the beating on the drum.
    Just my opinion though.
    Last edited by 54bogger; 12-27-2014 at 09:47 AM.

  4. #29

    User Info Menu

    Default Re: Rewrapping my drums - progress thread

    Thanks again everyone.

    I just got through getting as much of the old putty out as I could and putting in the new. I bought some of the DAP "Plastic Wood" stuff (I can't remember exactly right off hand). I used some pretty gritty sandpaper and a cheap putty knife to get out as much as possible.

    The DAP stuff wasn't as easy to work as I had hoped. It was a little bit gritty although I stirred it up. I tried to spread it with a putty knife to work it into all of the crevices, but it didn't work nearly as well as just using my fingers. I caked it on pretty good, so I'm going to give it more than the recommended 15 minutes. I'll post pictures of it after while.

  5. #30

    User Info Menu

    Default Re: Rewrapping my drums - progress thread

    The plastic wood will work fine. After you sand the first layer and still have divots and low spots you can always add another layer, or as many as needed.

    Also if your going to do another drum. The hair dryer method doesn't produce enough heat to melt the old glue.
    What's needed is a heat gun. I use a 4" sharp putty knife.
    As you heat the wrap, lift slowly and cut the glue with the putty knife as you pull on the wrap.

    “I did not trip and fall. I attacked the floor and I believe I am winning.”

  6. #31

    User Info Menu

    Default Re: Rewrapping my drums - progress thread

    Quote Originally Posted by PopsOldSkins View Post
    The plastic wood will work fine. After you sand the first layer and still have divots and low spots you can always add another layer, or as many as needed.

    Also if your going to do another drum. The hair dryer method doesn't produce enough heat to melt the old glue.
    What's needed is a heat gun. I use a 4" sharp putty knife.
    As you heat the wrap, lift slowly and cut the glue with the putty knife as you pull on the wrap.

    + 1. Heat guns get much hotter than hair dryers. If the wood is peeling off, the glue is not hot enough. Use the putty knife to seperate the two. Don't lift up on the old wrap.

  7. #32

    User Info Menu

    Default Re: Rewrapping my drums - progress thread

    "BTW- I wouldn't trust bondo on drums, I'd be worried about it breaking loose or cracking apart from all the beating on the drum."


    Living in the Jersey area, I've seen a lot of cars that have been in fenderbenders that have been body-worked and finished off with bondo.

    If you have ever driven in the NY-NJ area, you know that the roads are potholes with the occasional 5' of flat roadway. If cars can take that without the bondo cracking, I wouldn't worry about using it on drums.

  8. #33

    User Info Menu

    Default Re: Rewrapping my drums - progress thread

    Quote Originally Posted by Sticks4drums View Post
    + 1. Heat guns get much hotter than hair dryers. If the wood is peeling off, the glue is not hot enough. Use the putty knife to seperate the two. Don't lift up on the old wrap.

    I'll definitely keep this in mind. If I would have had access to a heating gun, I would have given it a shot.

    Ok, here are new putty pics. I took these after I got rid of the old putty, put on the new, waited, and sanded. I'm really happy with the results:

    The kick turned out great! I am very happy with it:


    Here's the rack tom. Not bad...:


    Ok, here's the floor tom. I'd have to say that this putty works!!!


    I ended up re-doing a couple of spots to clean them up. After I got through with everything, I went all over ALL of shells with 220 grit sandpaper, both inside and out. At this point, everything is pretty smooth to the touch. They look and feel so much better than after I originally removed the wrap last night. I'm happy with it.

    I decided to remove the hoop inlay. Unfortunately, it was glued all of the way around, so I had to wash them with warm water and use a wire brush (they are black metal hoops). They aren't perfect, but I'd have to say that at least 90% of the residue is now gone.

    With that said, everything is pretty much ready for the wrap. I think the only things left to do are to wipe the sawdust off of the shells with a damp rag and possibly do some adjusting on the metal snare where I had problems with the grommet. Besides that, I'm ready to roll!

  9. #34

    User Info Menu

    Default Re: Rewrapping my drums - progress thread

    Quote Originally Posted by rickthedrummer View Post
    "BTW- I wouldn't trust bondo on drums, I'd be worried about it breaking loose or cracking apart from all the beating on the drum."


    Living in the Jersey area, I've seen a lot of cars that have been in fenderbenders that have been body-worked and finished off with bondo.

    If you have ever driven in the NY-NJ area, you know that the roads are potholes with the occasional 5' of flat roadway. If cars can take that without the bondo cracking, I wouldn't worry about using it on drums.
    Like I said 'I WOULDN'T TRUST IT ON DRUM'S' to each his own.

  10. #35

    User Info Menu

    Default Re: Rewrapping my drums - progress thread

    Man that look's much better! That f/t looked a bit ruff but you've taken care of that, good job.

  11. #36

    User Info Menu

    Default Re: Rewrapping my drums - progress thread

    porkpieguy.
    Those turned out good.
    Another thing to remember.
    If your going to use a lite colored wrap, you will need to paint the outside of the shells (usually white). Otherwise the different shades (like the filler spots) will bleed threw the wrap.
    “I did not trip and fall. I attacked the floor and I believe I am winning.”

  12. #37

    User Info Menu

    Default Re: Rewrapping my drums - progress thread

    Awesome thread so far. Subscribed.
    DW - PEARL - PDP - ZILDJIAN - EVANS - VIC FIRTH


    Click for Gear Pics!

    DW Collector's Series - Blue Glass - 10, 12, 14, 16, 23
    Pearl Session Custom - Green Burst - 8, 10, 12, 14, 16, 22
    PDP CX Maple - Red Glass - 12, 14, 16, 24


    Quote Originally Posted by LudwigLifer View Post
    If we had centerfolds for drums,that kit would be in one of them!

  13. #38

    User Info Menu

    Default Re: Rewrapping my drums - progress thread

    The toms look great!
    Quote Originally Posted by rickthedrummer View Post
    There is intelligent life out there. The problem is that there isn't any here.

    -Mike

  14. #39

    User Info Menu

    Default Re: Rewrapping my drums - progress thread

    Martin, you came back and saved the shells with the help of a bunch thoughtful folks here. The heat gun, Dap wood filler and the last tip on painting the shells white before the wrap. Lot's of good pics too! Thanks. Looking forward to the end as you certainly must feel.

  15. #40

    User Info Menu

    Default Re: Rewrapping my drums - progress thread

    Quote Originally Posted by late8 View Post
    Martin, you came back and saved the shells with the help of a bunch thoughtful folks here. The heat gun, Dap wood filler and the last tip on painting the shells white before the wrap. Lot's of good pics too! Thanks. Looking forward to the end as you certainly must feel.
    Thanks Rich. I'm not sure I'm going to paint the shells at this point. I've never heard of doing this before. I'll clamp the wrap down really good and see if I can see any of the repair work through it. If I can, I'll consider painting the shells.

    Thanks again!

  16. #41

    User Info Menu

    Default Re: Rewrapping my drums - progress thread

    Quote Originally Posted by porkpieguy View Post
    Thanks Rich. I'm not sure I'm going to paint the shells at this point. I've never heard of doing this before. I'll clamp the wrap down really good and see if I can see any of the repair work through it. If I can, I'll consider painting the shells.

    Thanks again!
    You took the words right out of my mouth lol
    I was going to mention that clamp thing.
    Precision drum are the ones that recommend the white paint on light colored shells.
    I think you will be alright with the multi color of Mario wrap.
    “I did not trip and fall. I attacked the floor and I believe I am winning.”

  17. #42

    User Info Menu

    Default Re: Rewrapping my drums - progress thread

    It also helps to have a big spray bottle of Goo-Gone. You can peel the edge of the wrap back, saturate the crack and let it seap (seep?) down between the wrap and shell. Let it sit for about 10 minutes to work on the glue/adhesive, then gently peel off the wrap.....usually about 3-4" and then you need to spray some more. It's a slow process, but it works well. The Goo-Gone also makes scraping and cleaning off old glue 100X easier.
    -Brian

    "Too many crappy used drum stuff to list"

    Play the SONG......not the DRUMS!!!

    "I think that feeling is a lot more important than technique. It's all very well doing a triple paradiddle - but who's going to know you've done it? If you play technically you sound like everybody else. It's being original that counts." ~ John Bonham

  18. #43

    User Info Menu

    Default Re: Rewrapping my drums - progress thread

    porkpieguy?
    I think you need to change your user name to the "P"pieguy.
    You have Porkpie drums ,Pearl drums. Next up Premier drums?
    “I did not trip and fall. I attacked the floor and I believe I am winning.”

  19. #44

    User Info Menu

    Default Re: Rewrapping my drums - progress thread

    Quote Originally Posted by PopsOldSkins View Post
    porkpieguy?
    I think you need to change your user name to the "P"pieguy.
    You have Porkpie drums ,Pearl drums. Next up Premier drums?


    I'll play'em if you're buyin'!

    I have a set of Tama Rockstars sitting in cases too. Never in my life did I ever think I'd have more than one decent drum set, never mind three.

  20. #45

    User Info Menu

    Default Re: Rewrapping my drums - progress thread

    Another thing I had thought about was doing offset lugs, but that's way too much plugging, hole filling, drilling, and room for error. Sure would look cool though. Maybe if I do another project in the future, I'll tackle it. I'm ready to get these things done. Right now it's a waiting game though.

  21. #46

    User Info Menu

    Default Re: Rewrapping my drums - progress thread

    Porkpieguy, you have me very interested in your project. I'm watching closely, cuz i'm thinking of building a 14" floor tom from scratch, and wrap it to try to match the rest of my kit. Keep the pictures and details coming! Looks great so far!
    Aut Viam Inveniam Aut Faciam
    "I shall either find a way or make one"

  22. #47

    User Info Menu

    Default Re: Rewrapping my drums - progress thread

    Tuned in - enjoying the progress. Keep the pics coming and great work so far!

    Tex

  23. #48

    User Info Menu

    Default Re: Rewrapping my drums - progress thread

    wow..just read the whole thread..pure awesomeness bro! Respect

  24. #49

    User Info Menu

    Default Re: Rewrapping my drums - progress thread

    No major updates, but just a couple of things:

    1. The wrap shipped yesterday! I'm estimating that it will be here on Saturday.

    2. I got my new reso head yesterday. A couple of things that I noticed. One, the head did not come in a box itself. I mean AMS boxed it, but it was wrapped in plastic. Nothing was damaged, but it was something that I noticed. Another thing that I noticed about this was the size of the control ring on the inside which is a good thing. I'll just have to be careful when cutting the port.


    Sorry for the thumb...


  25. #50

    User Info Menu

    Default Re: Rewrapping my drums - progress thread

    I like the information. I looked into re-wrapping my old Sonor kit. Nice tips in here. Can't wait to see your finished product.

Tags for this Thread

Bookmarks

Posting Permissions

  • You may not post new threads
  • You may not post replies
  • You may not post attachments
  • You may not edit your posts
  •